
Well I just started using Pixieset to deliver images and I LOVE it! I know that it an be a bit confusing to people so I thought I would give a few instructions on how to use it if anyone has questions.
Here is a link with the basic instructions that I found super helpful!
http://support.pixieset.com/knowledgebase/articles/228993-how-does-deliver-via-digital-download-work
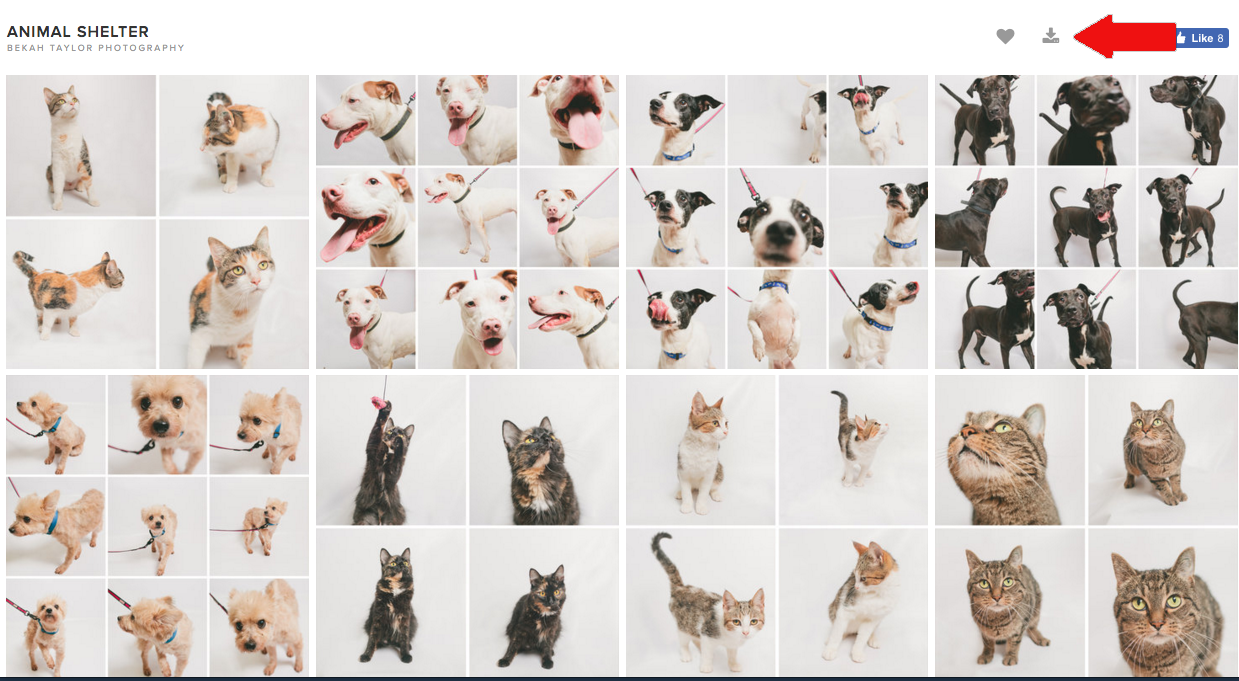
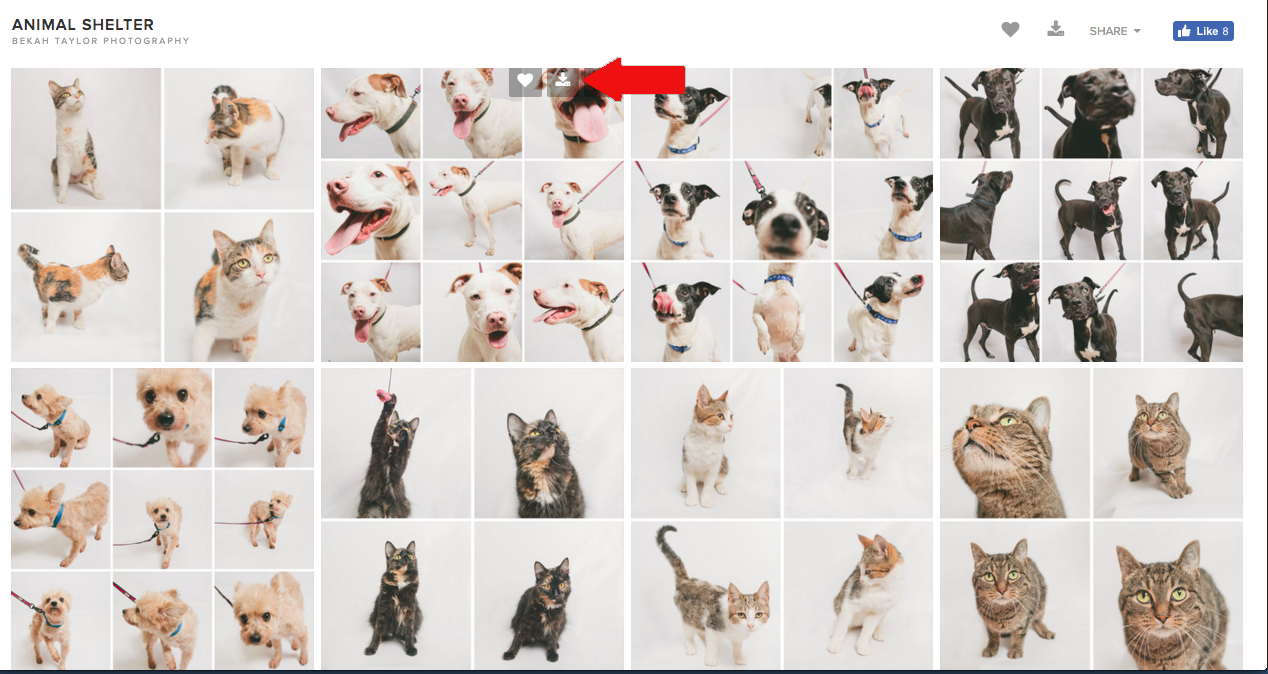
When you first open up the link it will come to the home page. You can look through all the photos and enjoy them! I love Pixieset because you can send the link to anyone you want to view them, but only those that have the download pin will be able to access the files. So you can share the images without being worried that someone you don’t know will be able to print them.
When you are ready to download just click that button that the red arrow is pointing to.
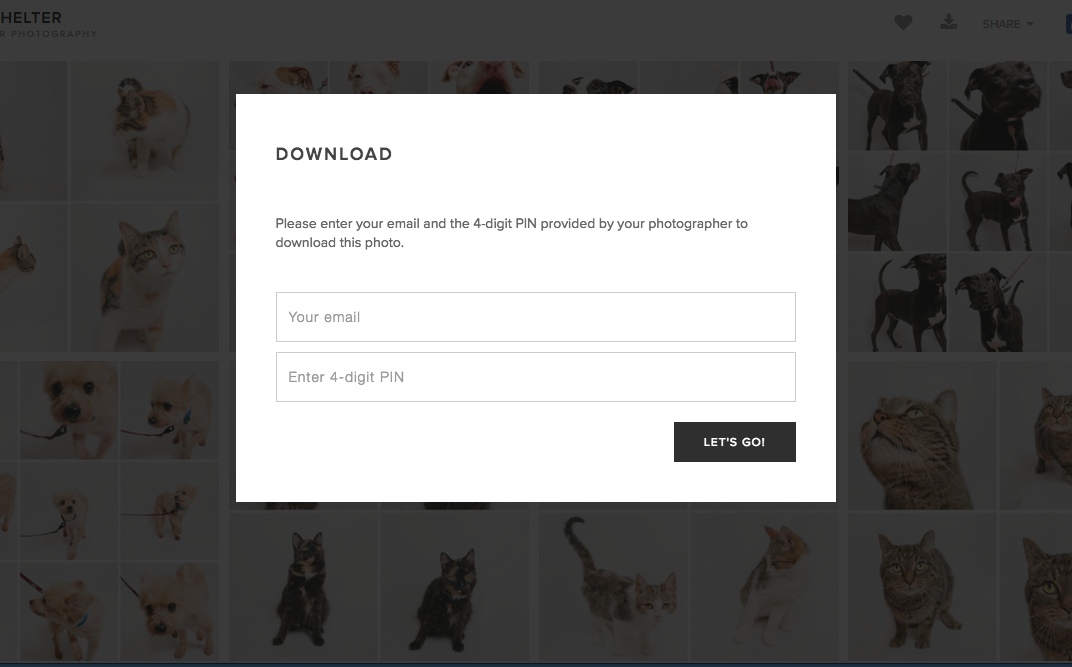
Once you have hit this button it will prompt you to fill in your email and download pin.
Once you have entered your email address you will see a page that allows you to select which folders of photos you want to download and what size you would like to download. When looking at the folders, you can choose to download all the folders, or only specific ones. Often if it is a family photo session or senior photos, all of the files will be in one folder. If it is a wedding then often the folders will be separate so that you do not have to download everything at the same time.
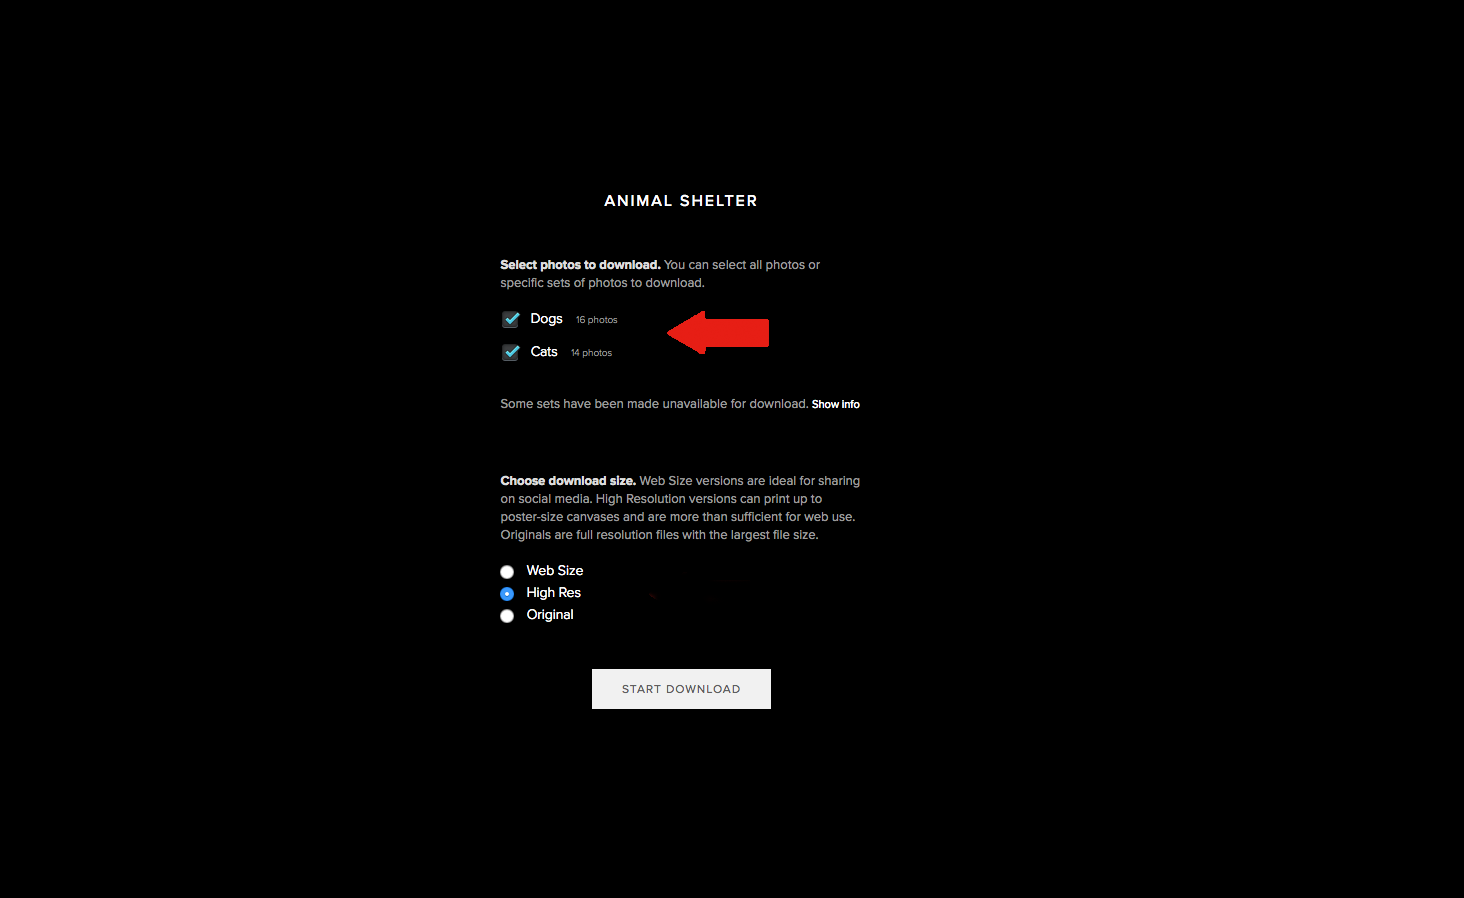
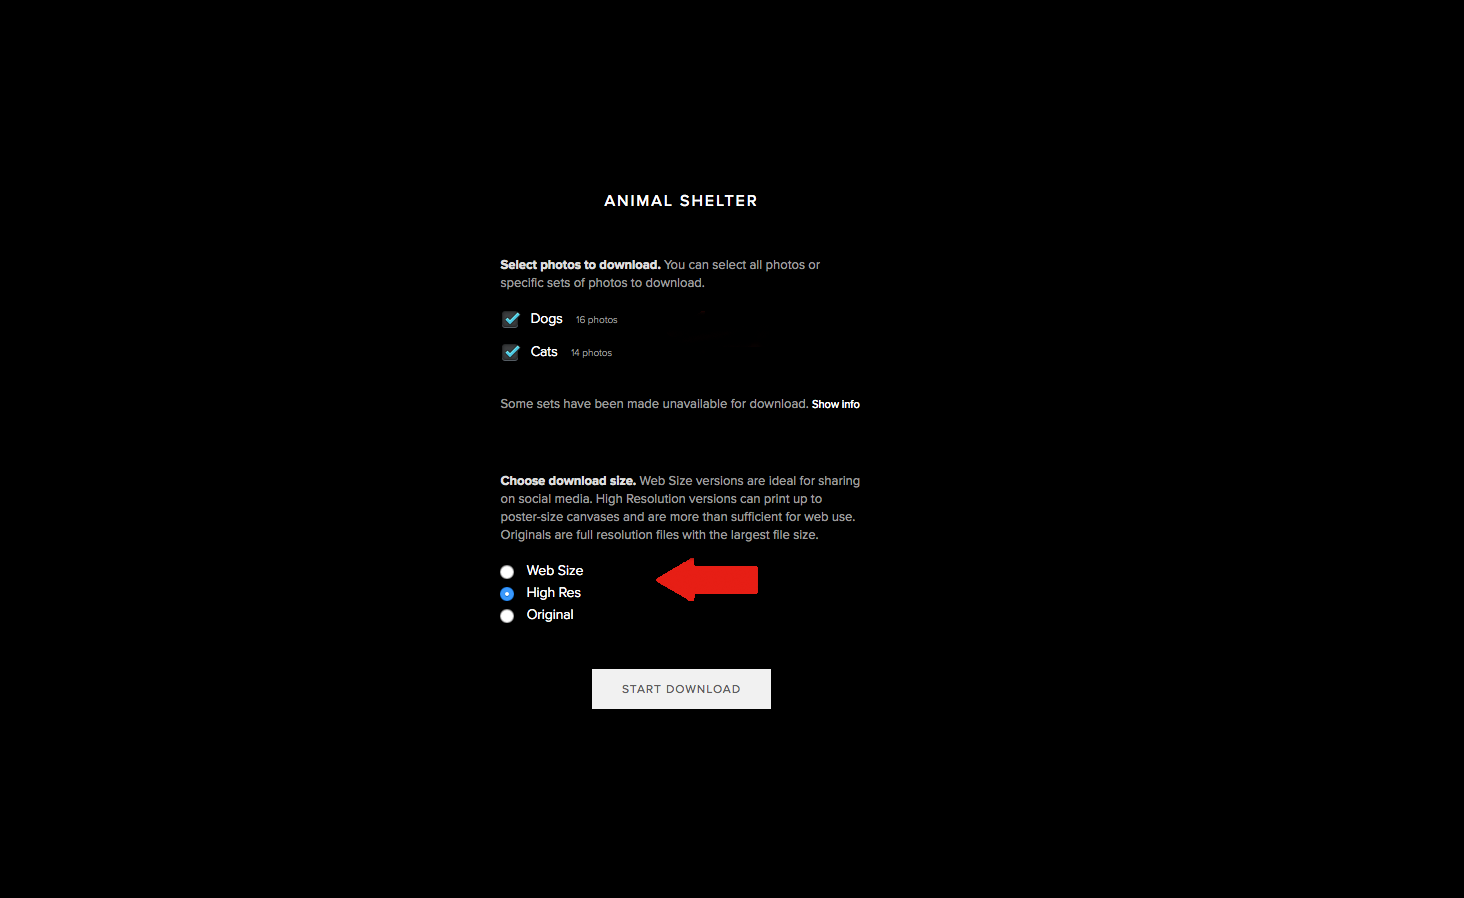
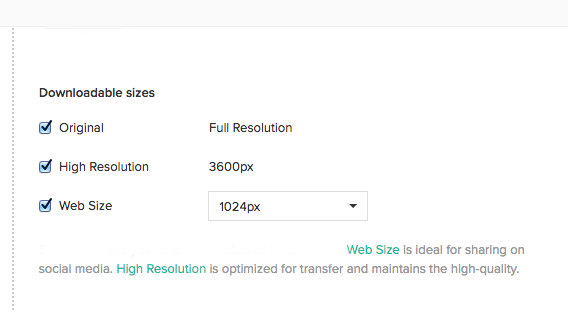
On the same page you will be asked to select what file size you would like to download. There are three choices. Web Size. High Resolution. Original. The nice thing about this is that you can save all the photo files at their original size and then come back and download the same photos at a web size for you to use on social media. That is why I love this!
Here is a list of what size you would actually be downloading with each option.
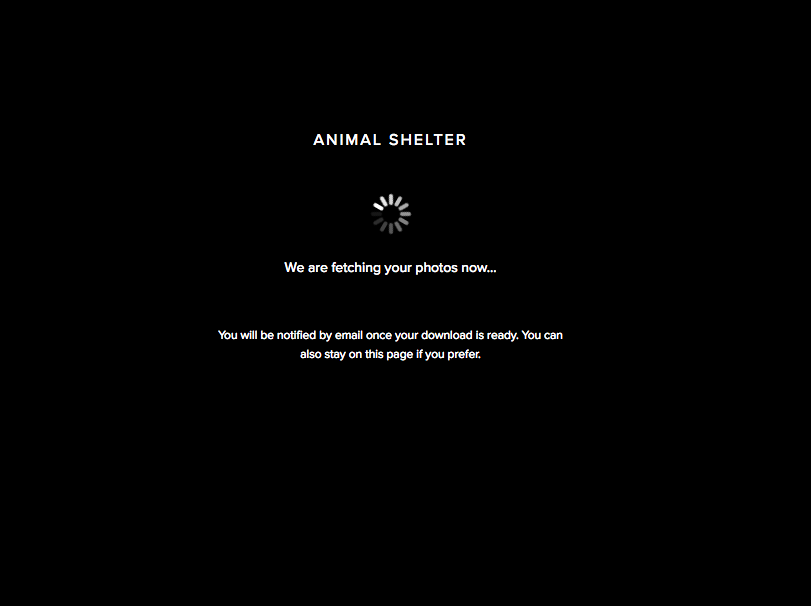
Once you have chosen what albums and size files you would like, you hit “Start Download” and you will be prompted with a page to let you know that the download is in process.
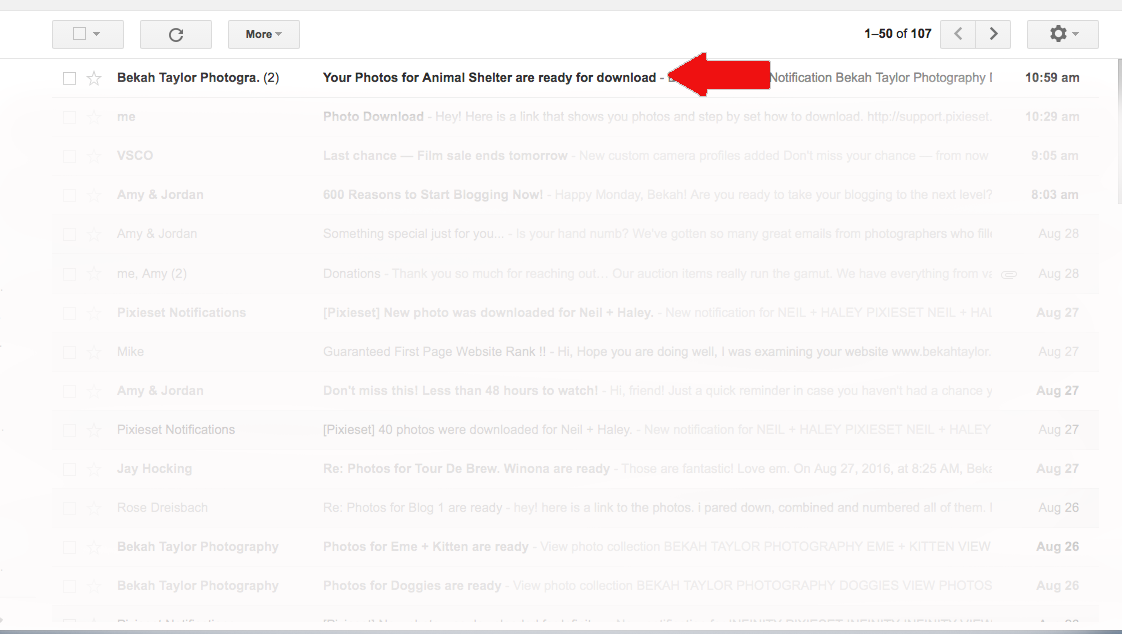
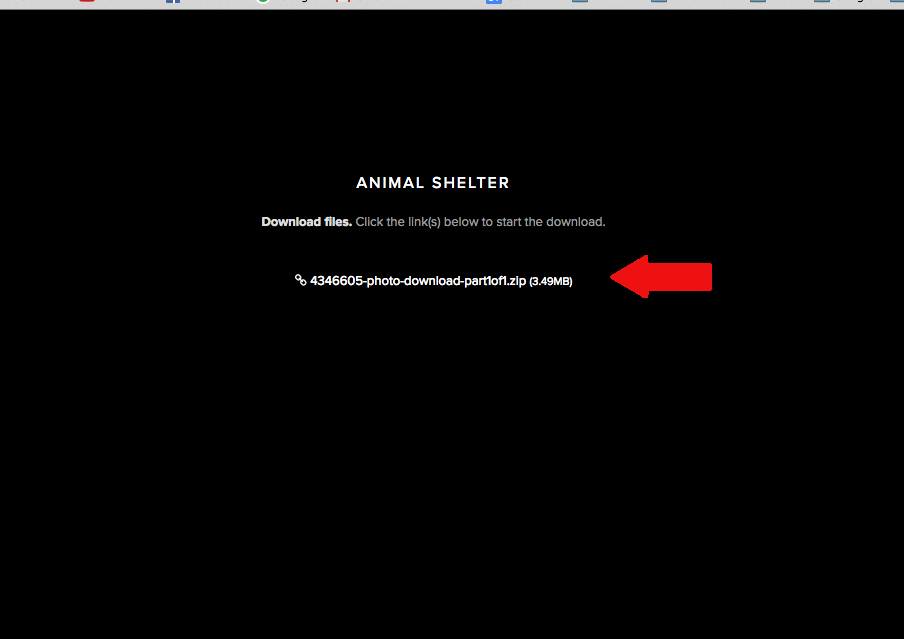
You will receive an email that will take you to the download page.
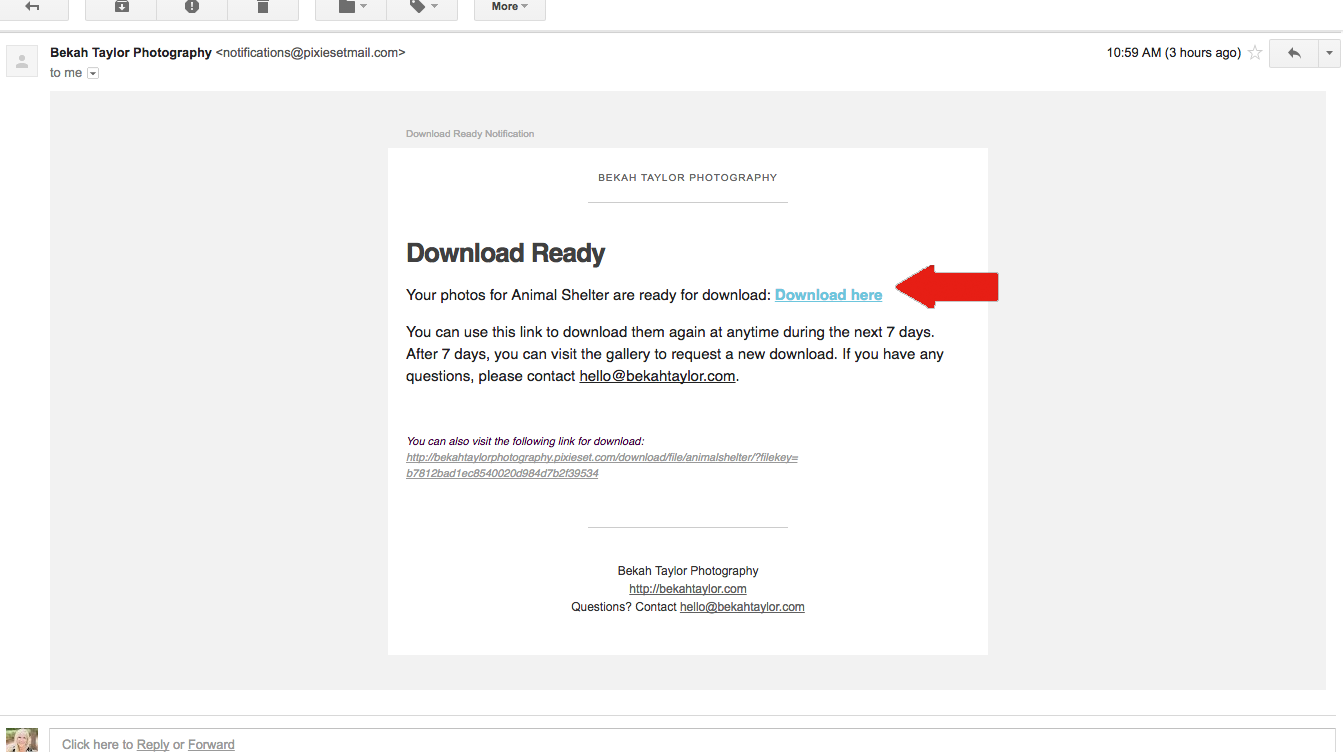
Click on the link to download.
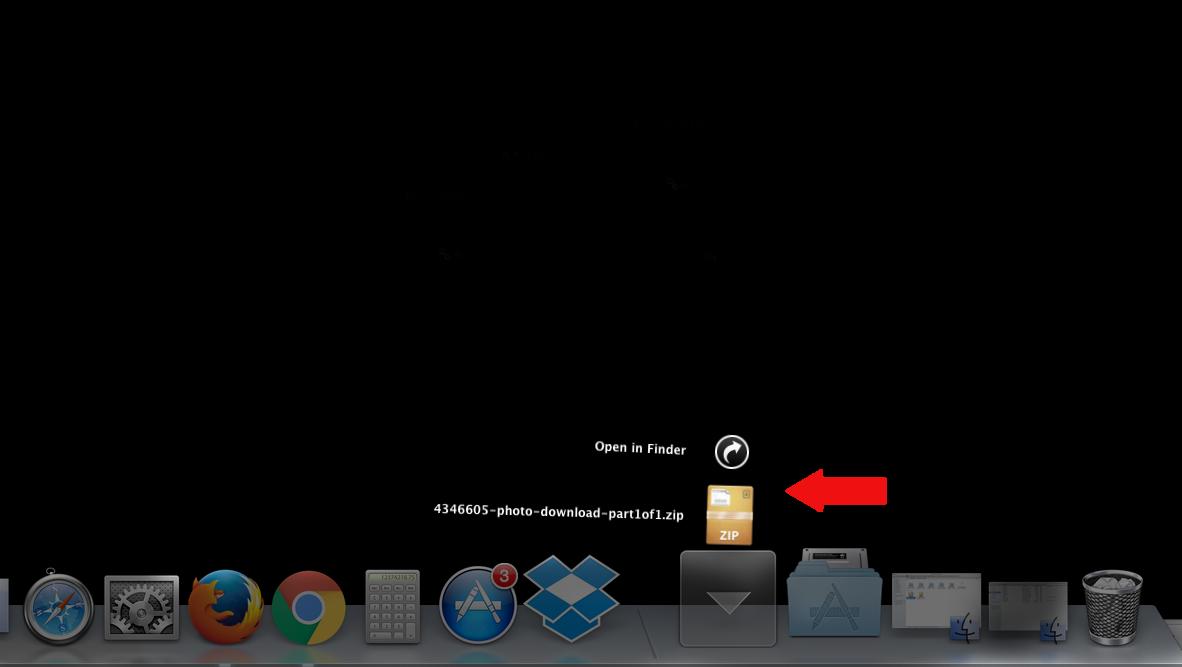
A ZIP file should copy into your download folder.
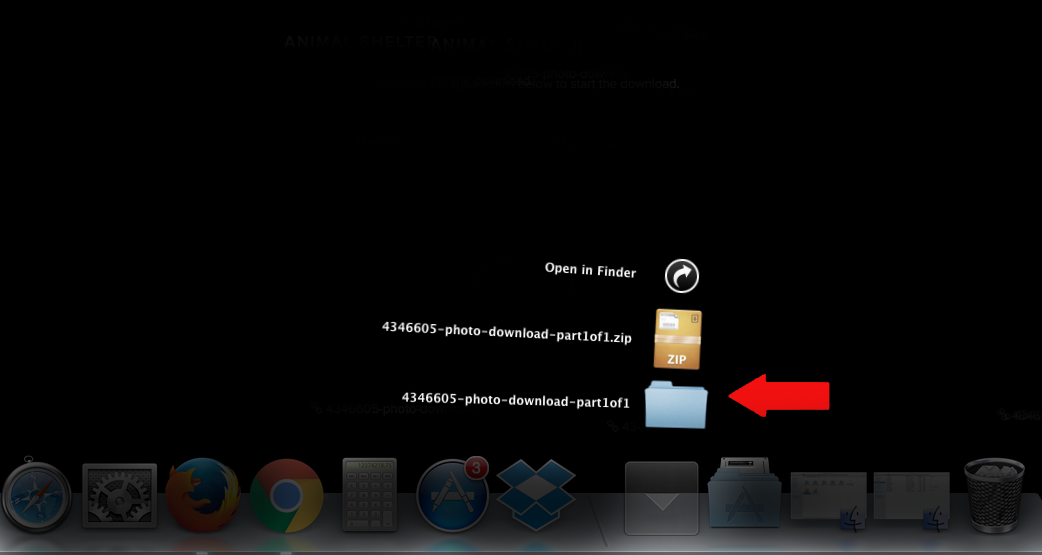
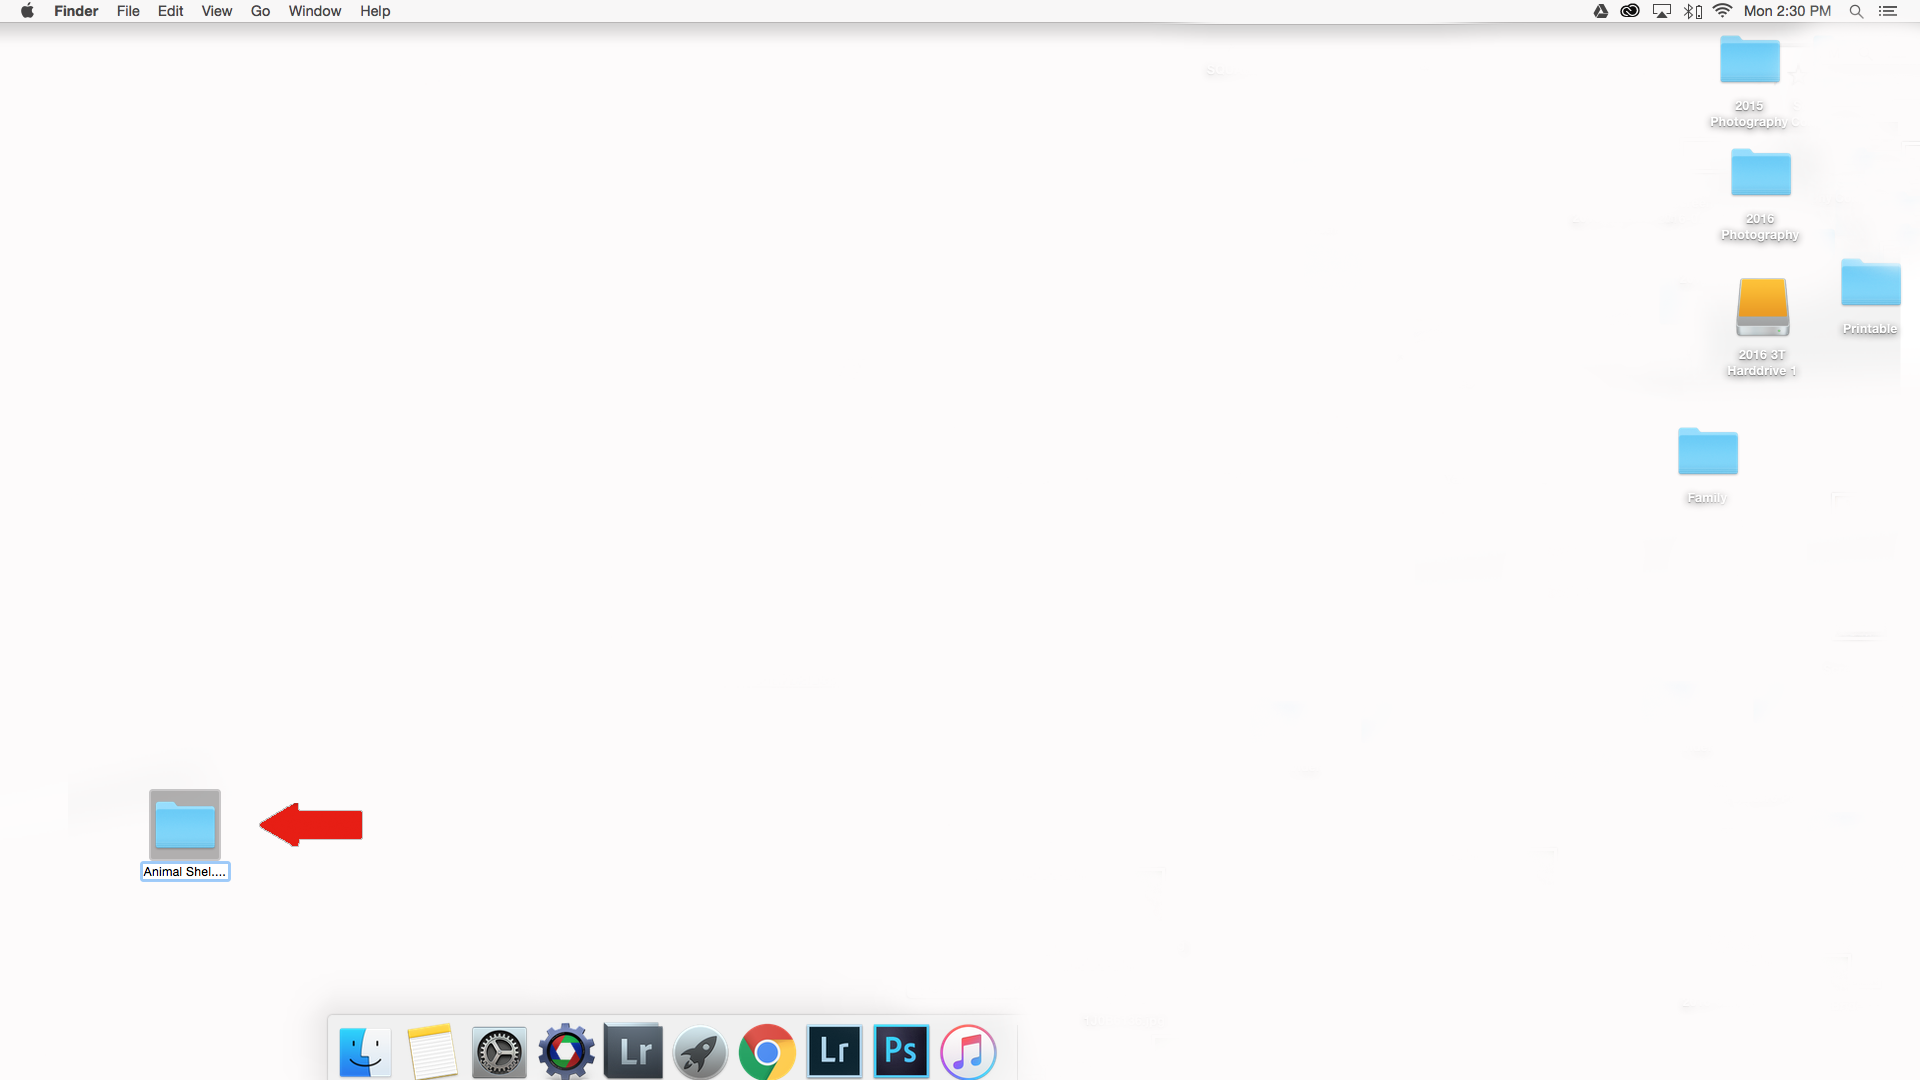
Double click the ZIP file and it will bring up the folder of images. I like to drag that folder onto my desktop or onto my flash drive so that it is saved somewhere other than my Downloads folder.
I would rename the file so that isn’t such a long weird name! Once you have saved the photos onto your desktop or flash drive, they are now on your computer and you don’t need to use Pixieset again to access the files unless you want to.
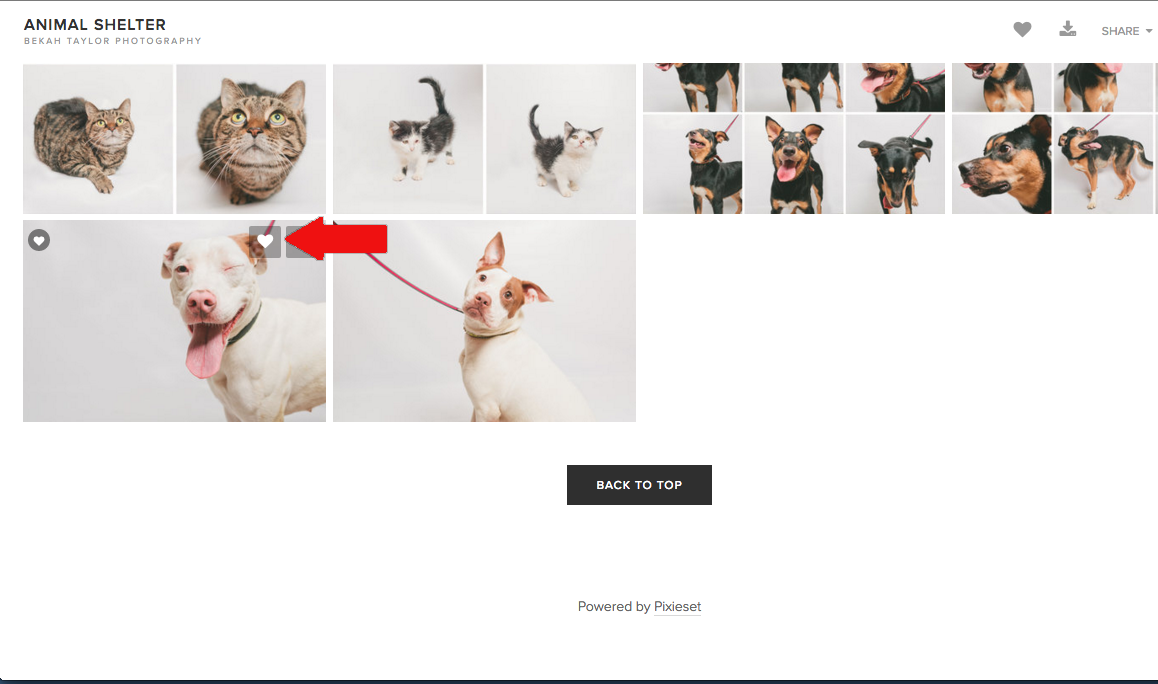
You can also just download individual photos straight into your computer’s Download Folder by clicking the download button on the individual photo.
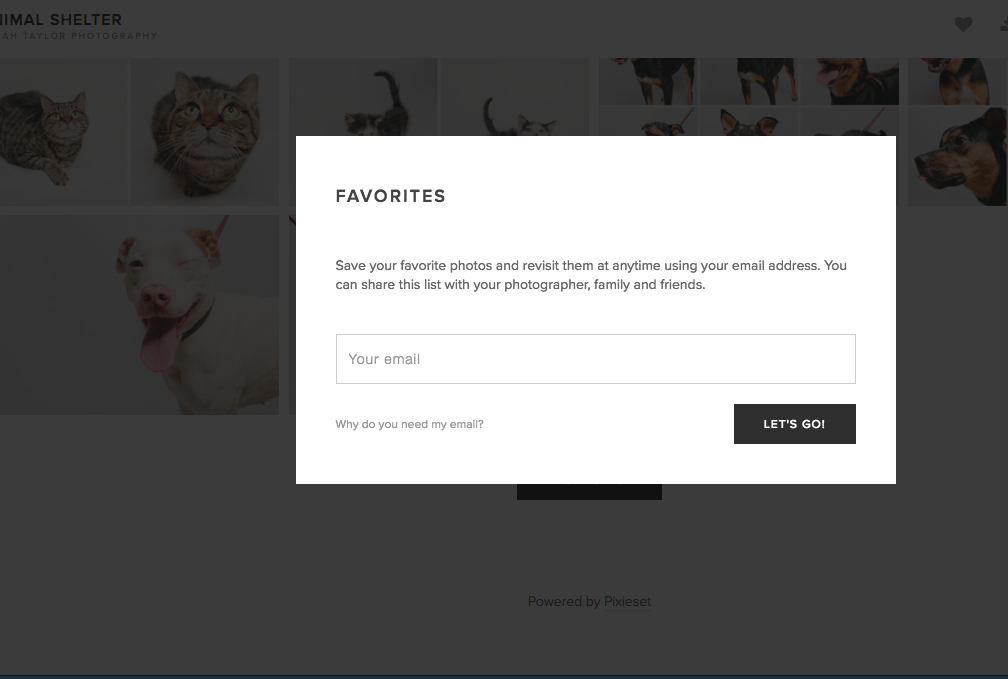
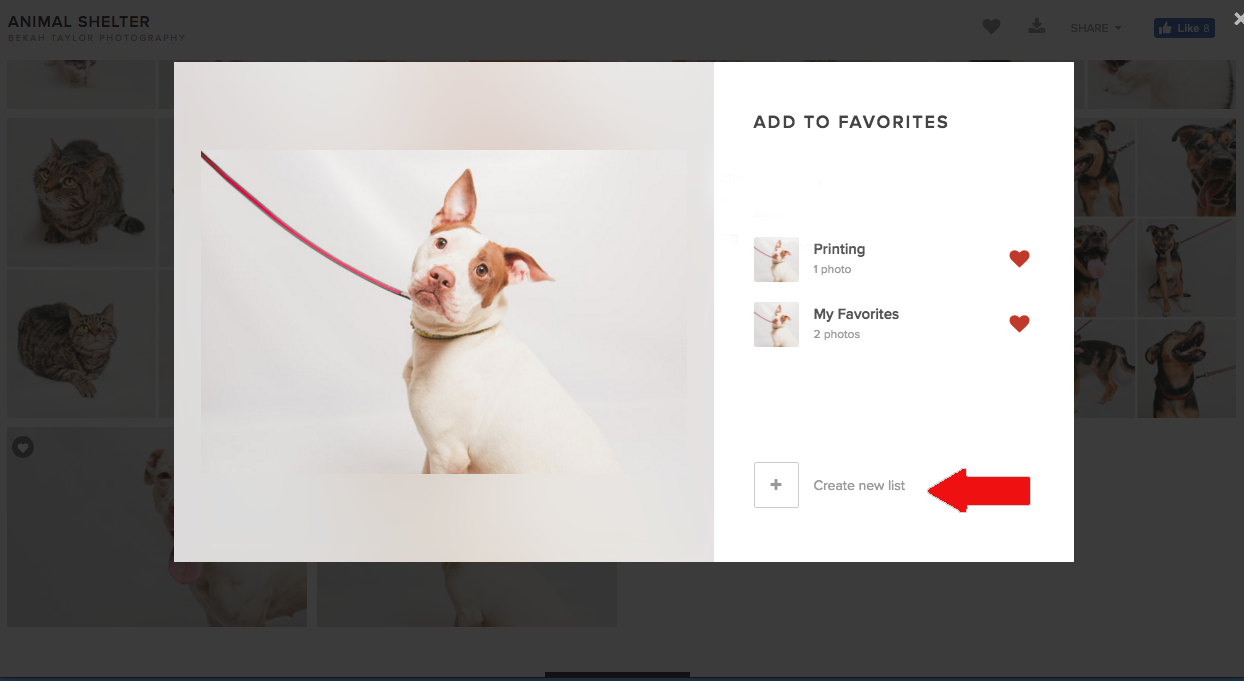
Another feature that I love is the “Favorites” option! You can select photos that you love by hitting the “heart” button on each photo.
Once you hit the “Heart” you will be prompted to fill in your email address.
You will need to choose which folder you want it to go in. Are these your favorite photos? They could go in the Favorite folder. You could make a folder of all the photos you want to send just to Grandma? Do you want them in a Printing folder or a Social Media folder. It is amazing because you can choose the same photo to go into multiple folders.
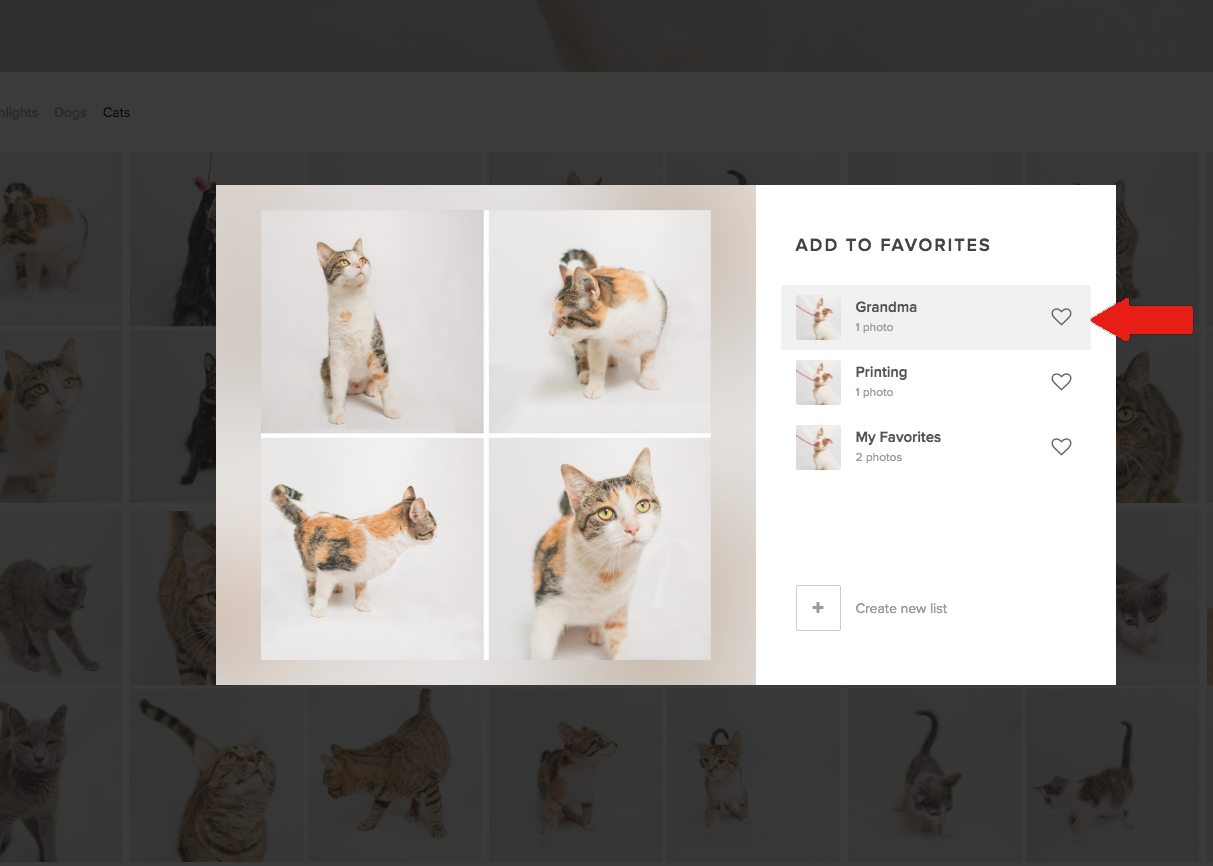
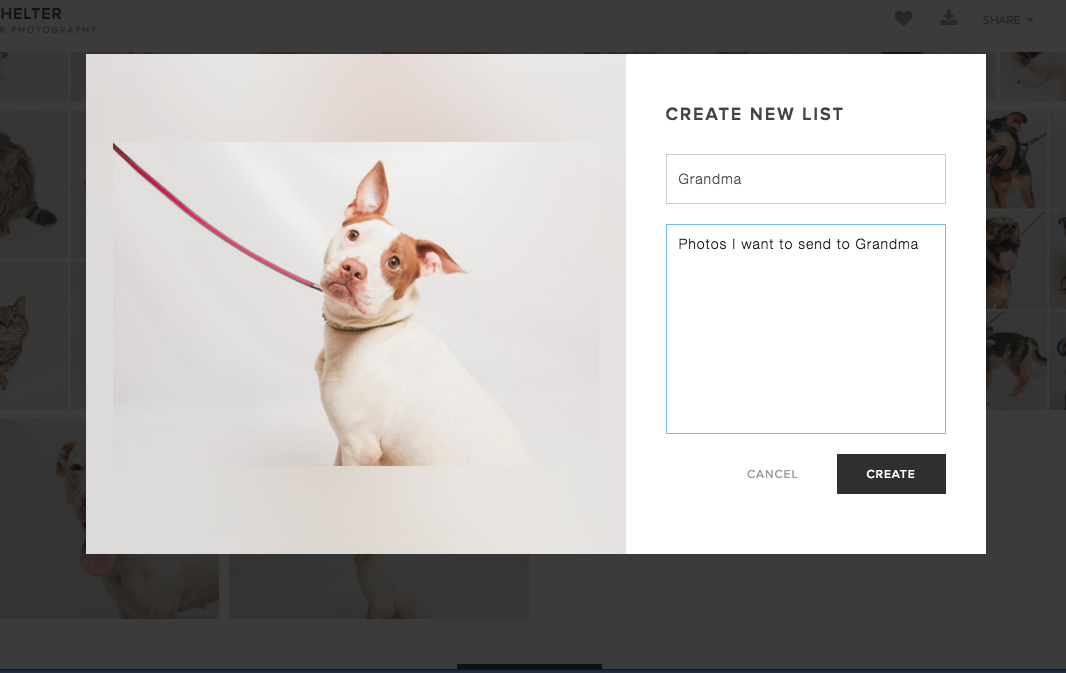
If you need to make a new folder/list it is super easy. Just click the New List button and fill in the info.
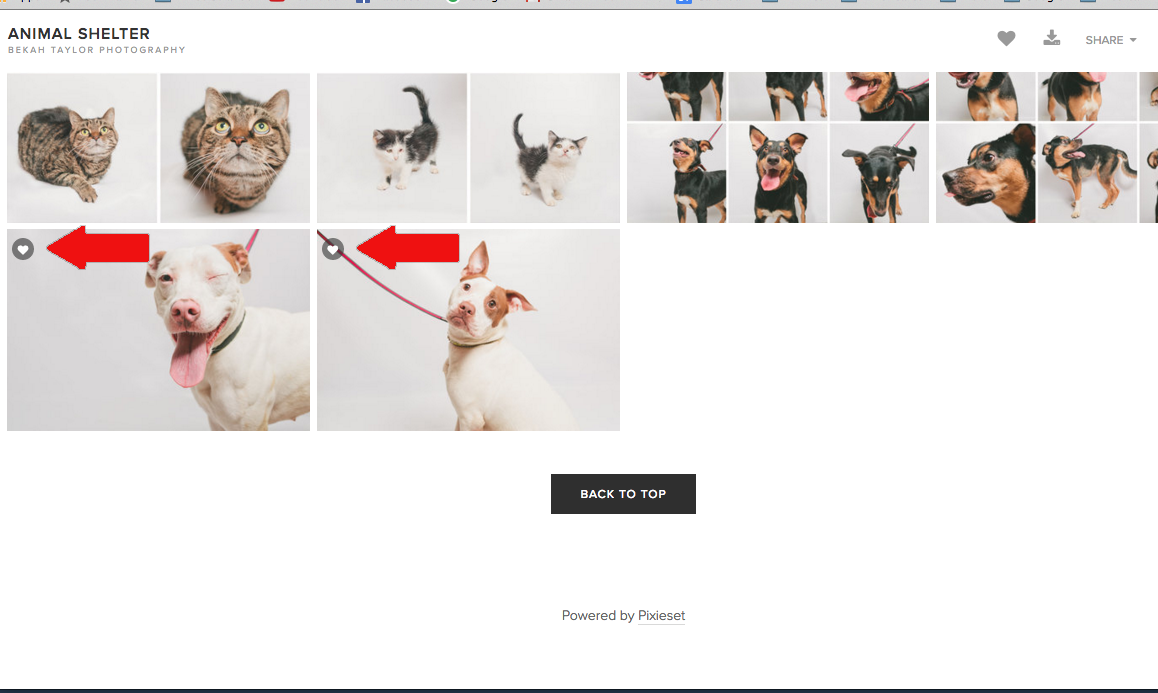
You can tell which photos have been “Favorited” because you will see a little heart that shows up on each photo in the top corner.
If you want to access all of your “Favorite” folders, just scroll to the top and click the ‘Heart’ just underneath the cover photo.
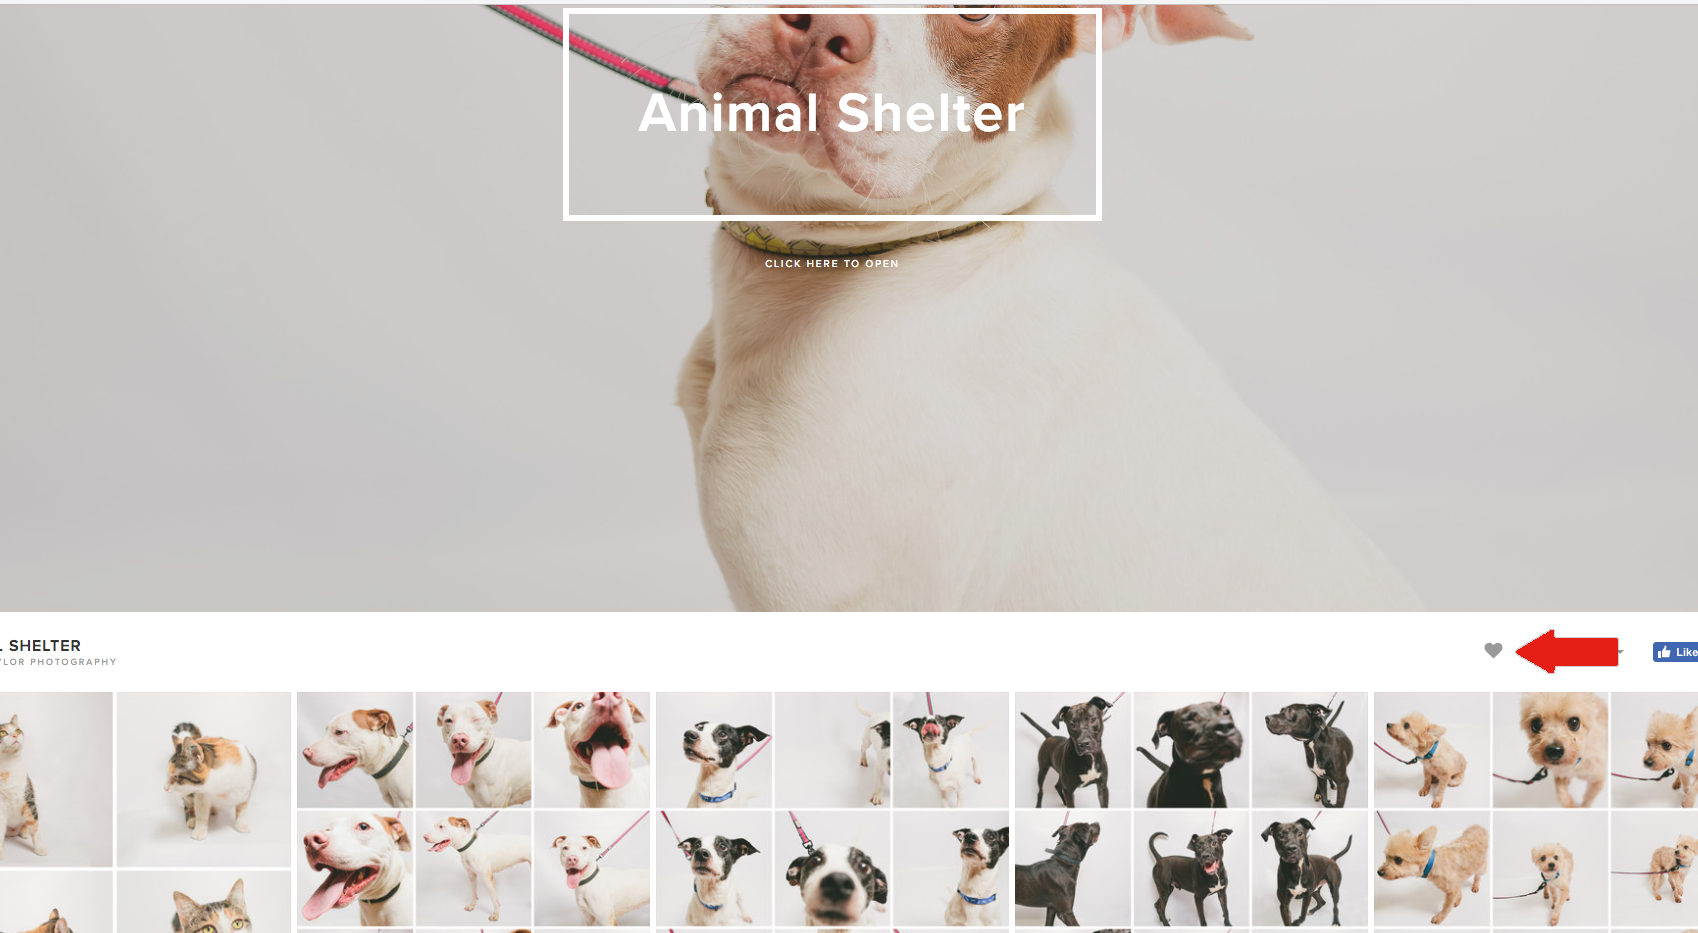
It will take you directly to all your folders!

Pixieset offers a lot of options and I love it so much! If you are still having trouble after reading though this tutorial just let me know! I’d be more than happy to help you out!
